This post may contain affiliate links. If you click one, I may earn a commission at no cost to you. As an Amazon Associate I earn from qualifying purchases.
The durability and efficiency of your electric shaver depend of course on the model you’ve chosen, but above all on the way you look after it.
So, whether you’ve got a foil shaver or a rotary head, whether it’s waterproof or not, we’ve got all the tips you need to take good care of your shaver!
For electric foil shavers (Panasonic or Braun type)
If you have a foil shaver, there are 4 steps to easily clean it:
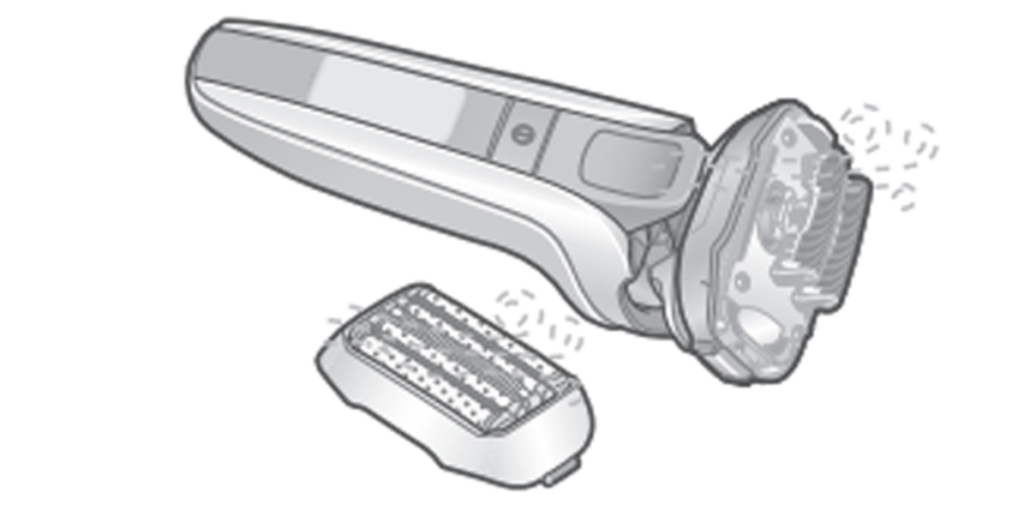
- First, remove the shaver guard.
- Use a dusting air blower to remove any hair residue that may be clogging the head of your electric shaver.
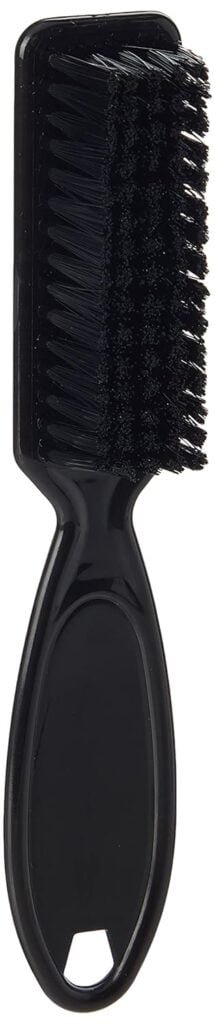
- Hold the blades on either side with your thumb and forefinger and brush in the direction of the blades with a cleaning brush.
- Dry the foil with your air blower and replace the foil when it’s completely dry.
WARNING: Never brush the foil of your shaver, as this will damage it immediately.
Here are some products that will be essential to clean your foil shaver efficiently:
For Philips electric shavers or electric shavers with rotating heads
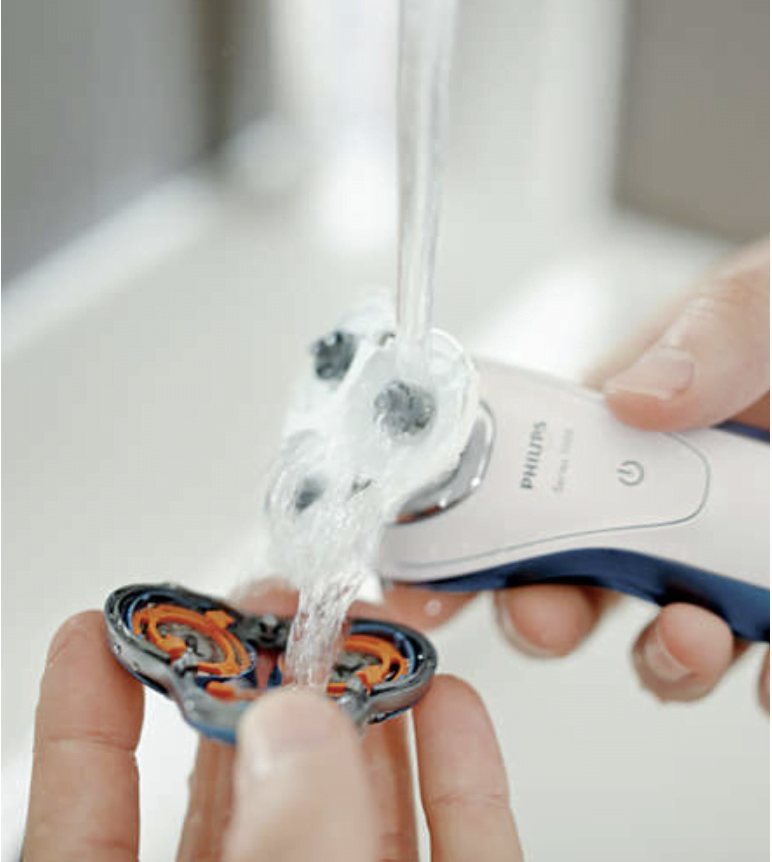
- If you don’t want to disassemble your shaver, you’ll need an air blower to clean the rotating heads.
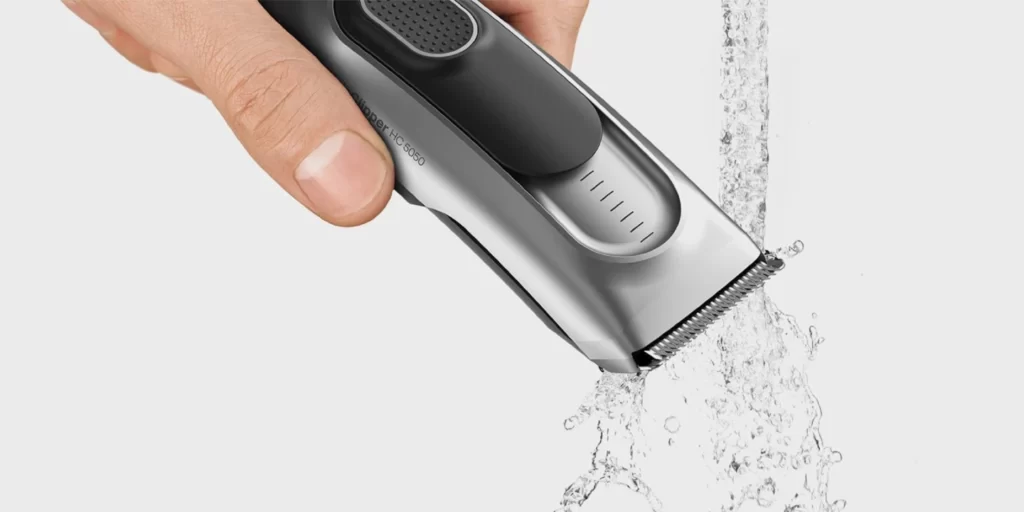
- If your electric shaver is waterproof, run the heads under water.
- Dry the heads with an air blower and put them back when the clipper’s head is dry.
Here are some products that will be essential to clean your rotative shaver efficiently:
For hair clippers
It’s crucial to regularly service clippers and trimmers to prevent issues. Be on the lookout for these common signs that servicing is needed:
- Inability to achieve a clean, smooth cut
- Loud, rattling, or grinding noises during use
- Frequent powering on and off during use
- Loose levers or handles
- Inability of the blades to cut hair
- Overheating
Addressing these problems quickly through proper servicing will restore performance and prevent further damage.
Prepare the following accessories:
- a clean, dry cloth
- cleaning brush
- lubricating oil
- cooling and cleaning spray
A word of advice: avoid using your clippers after applying hair care products. This may affect the sharpness of the blade.
3 Essential Maintenance Tips for Barbers
Implementing a simple, consistent maintenance routine is key to getting the most out of your clippers and trimmers. Here are the top 3 tips:
1. Thoroughly Brush the Blades After Each Cut
Hair buildup between the blades is a leading cause of dulling and pinching. Regularly brushing removes this debris.
- Use a barber’s fade brush rather than the included brush for best results. Look for sturdy bristles and a wide surface area.
- Brush thoroughly along the blades, joints, and hinge. Pay special attention to gaps where hair collects.
- Alternatives like soft-bristle toothbrushes also work in a pinch.
- Make brushing after each cut a habit to prevent buildup.
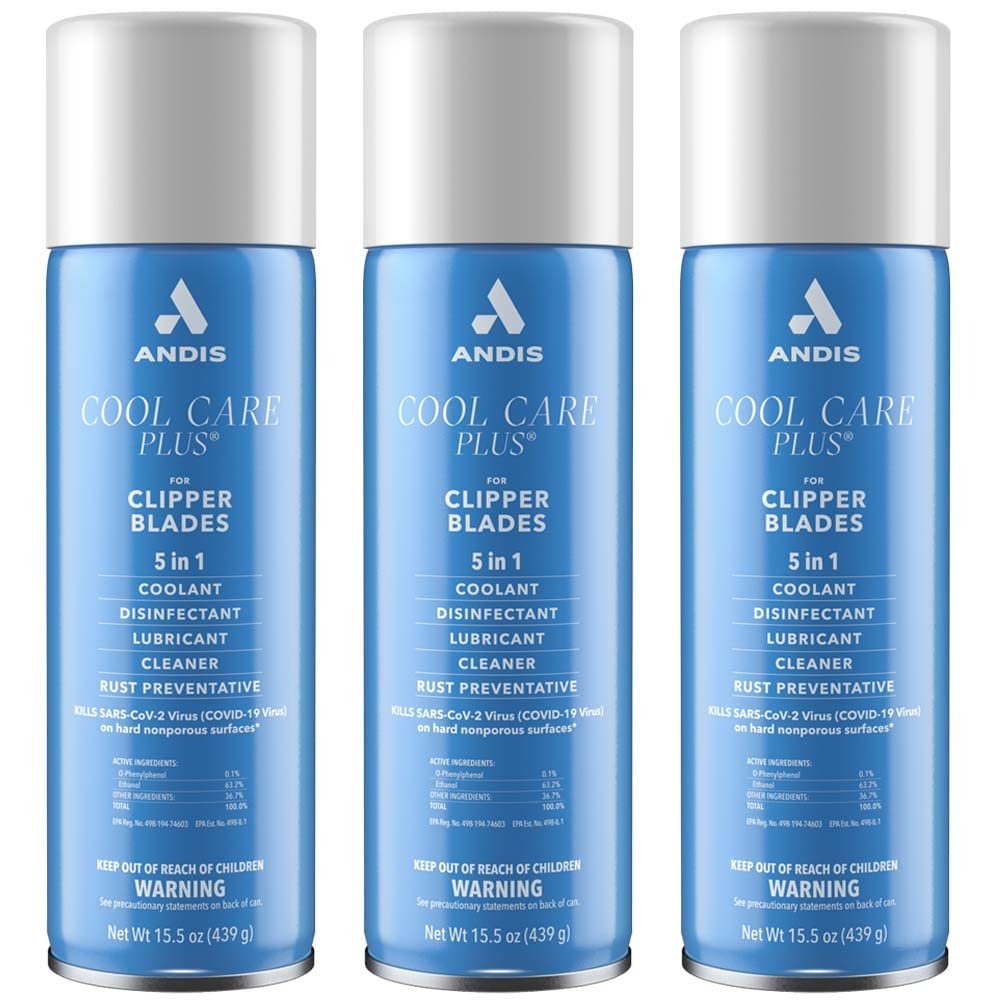
2. Apply a Lubricating Coolant Spray
Friction creates intense heat that can damage clippers. A lubricating spray addresses this.
- Use a spray that cools, lubricates, and disinfects all at once. Andis Cool Care 5-in-1 is a top choice.
- Hold the can a few inches away and spray lightly onto the blades with clippers running.
- Let run for 5-10 seconds after spraying to evenly distribute.
- The lubrication reduces wear while cooling minimizes risk of heat damage.
3. Oil the Blades Regularly
In addition to lubricating sprays, regularly oiling is key for smooth function.
- Use a dedicated clipper oil and apply a 5-point system.
- Put 3 drops along the blade teeth and 1 drop on each rail end.
- Run clippers briefly to disperse oil. Wipe away any excess.
- Oiling every 1-2 days maintains smooth function and prevents rust.
- In a pinch, use vegetable oil rather than no oil at all. Avoid heavier oils.
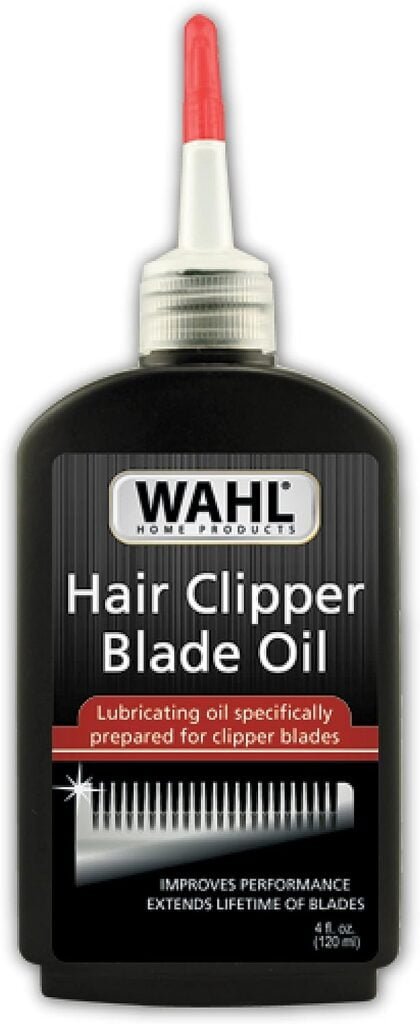
Which lubricant oil should I use for my clippers?
But which oil should you use? The lubricating oil you use to clean your hair clipper doesn’t depend on the model. If used correctly, any lubricating oil will do. However, some perform better than others.
We particularly recommend WAHL’s Wahl Clipper Oil. It can be used on all models of clippers. Do not use WD40 as it can cause other oils to break down and could cause permanent damage to your hair clippers’ engine If it gets into it.
This oil keeps your clipper blades in perfect condition thanks to its simple application. It’s ideal for regular maintenance of your appliance, thanks to its 120 ml format (since only a few drops are needed between the blades).
It reduces friction between the blades, which in turn reduces energy consumption, motor power and cutting force, and prevents the blades from overheating.
How often should I oil my hair clippers?
Good maintenance of hair clippers is essential for optimum performance and longevity. Oiling hair clippers is a crucial part of their maintenance routine, as it keeps the blades lubricated, preventing them from rusting and dulling.
Hair clippers should be oiled every 2 to 3 months, depending on how often they are used. Here are a few tips for oiling hair clippers:
- Always use an oil specially formulated for hair clippers.
- Apply 2-3 drops of oil to the blades and turn the clippers on for a few seconds to distribute the oil evenly.
- Wipe off any excess oil with a clean cloth to prevent it from entering the engine.
By following these simple steps and regularly oiling your hair clippers, you can keep them in perfect working order for years to come.
Why use lubricating oil on your hair clippers?
It’s often advisable to wash your beard or hair clippers with water. However, this depends on the model. Some clippers, such as the WAHL Color Pro Cordless hair clipper, allow you to wash the blades with water, while others do not.
However, washing with water does not mean you don’t need to lubricate your clippers. Oil, on the other hand, helps combat limescale deposits.
By regularly applying oil, you ensure that the blades continue to run smoothly. Without oil, friction between the blades increases and wear on the materials will be high.
Greater friction not only leads to heat (which can become unpleasant) but also to greater resistance, meaning the motor has to work harder to move the blades.
That’s why we recommend that you oil your clipper regularly. This not only optimizes the product’s performance, but also its durability.
The more you use your clipper, the more often it needs to be oiled. This takes little time, but can have a very positive impact on the product’s use and longevity.
Do not use hair oil, grease or oil mixed with kerosene. The solvents in these products evaporate, leaving behind a thick oil that slows down the blades and thus reduces the c
Deep Cleaning Methods for Thorough Disinfecting
Deep cleaning weekly or bi-weekly is vital for sanitation and preventing buildup. Here are proven methods:
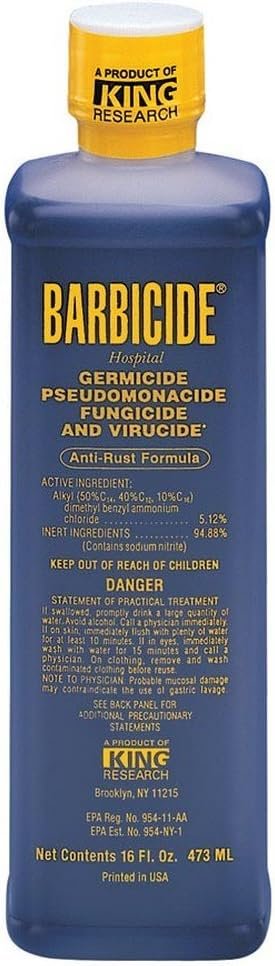
Barbicide Solution
- Barbicide is the beauty industry standard disinfectant, effective against bacteria, viruses, and fungi.
- Mix 1⁄4 cup concentrate with 4 cups water as directed. Submerge blades for up to 10 minutes.
- Rinse thoroughly before drying and reattaching blades.
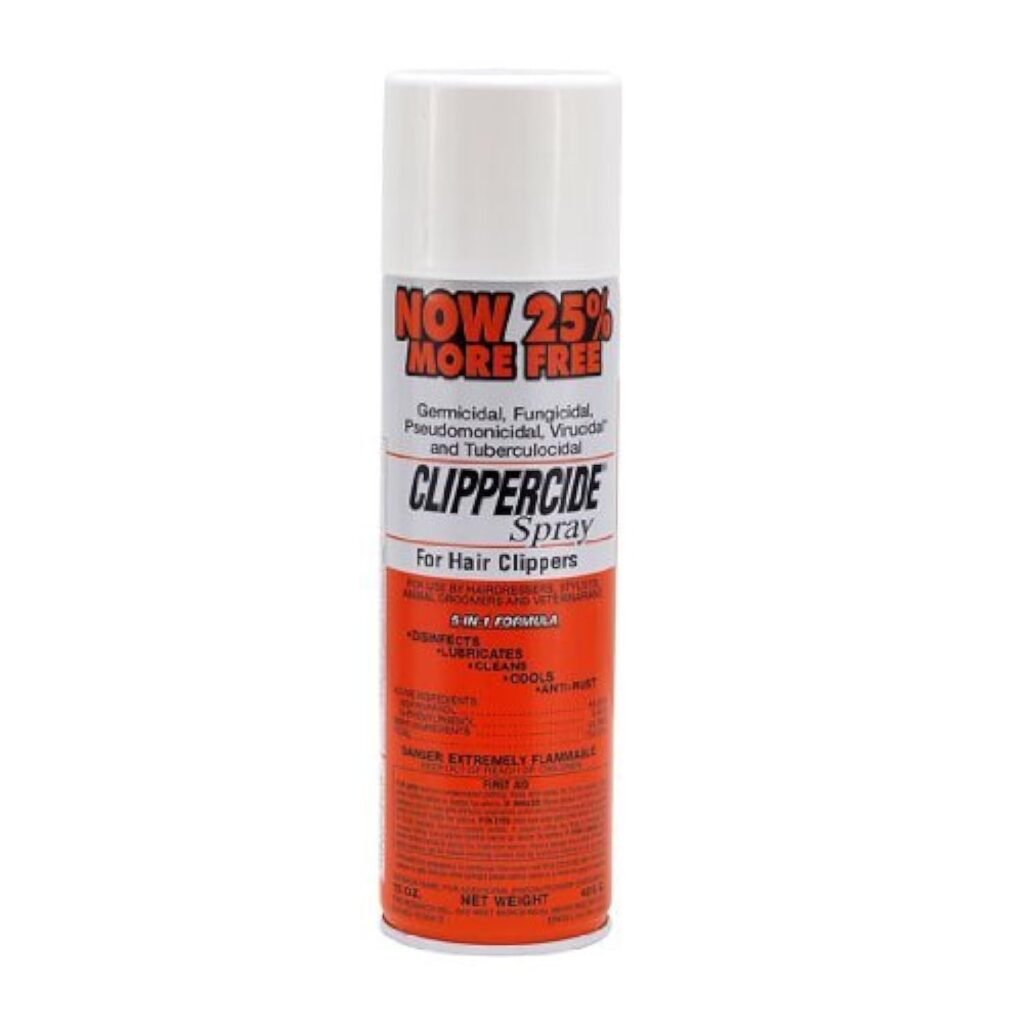
- You can also use the spray barbicide for a quicker way of disinfecting your blades. We recommend the Clippercide Spray as it is widely used by industry pros.
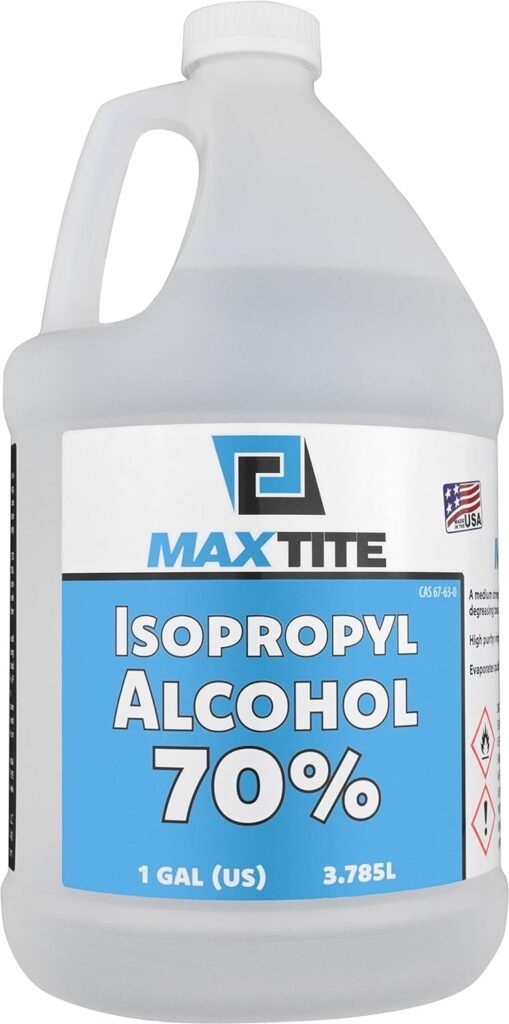
70% Isopropyl Alcohol
- Isopropyl alcohol kills microorganisms through chemical disruption of their cell walls.
- Submerge the blades in alcohol for no more than 3 minutes.
- Rinse with water, dry thoroughly, and reattach.
Distilled White Vinegar
- The acidic vinegar dissolves residue and kills microbes.
- Submerge blades for 30-60 seconds.
- Use a suitable cleaning cloth to wipe the blades dry.
- Rinse thoroughly with water before reattaching the blades.
Quick Cleaning Ways
In addition to weekly deep cleaning, quick cleaning between clients is crucial for sanitation and performance.
Disinfecting Spray
- Keep a multi-use spray on hand for easy disinfecting between cuts.
- Spray the blades for just a few seconds while running.
- The spray will disinfect, cool, and flush away debris in seconds.
70% Isopropyl Alcohol
- Dip blade tips into a bowl of alcohol to kill microbes.
- Run clippers for a few seconds afterward to flush away residue.
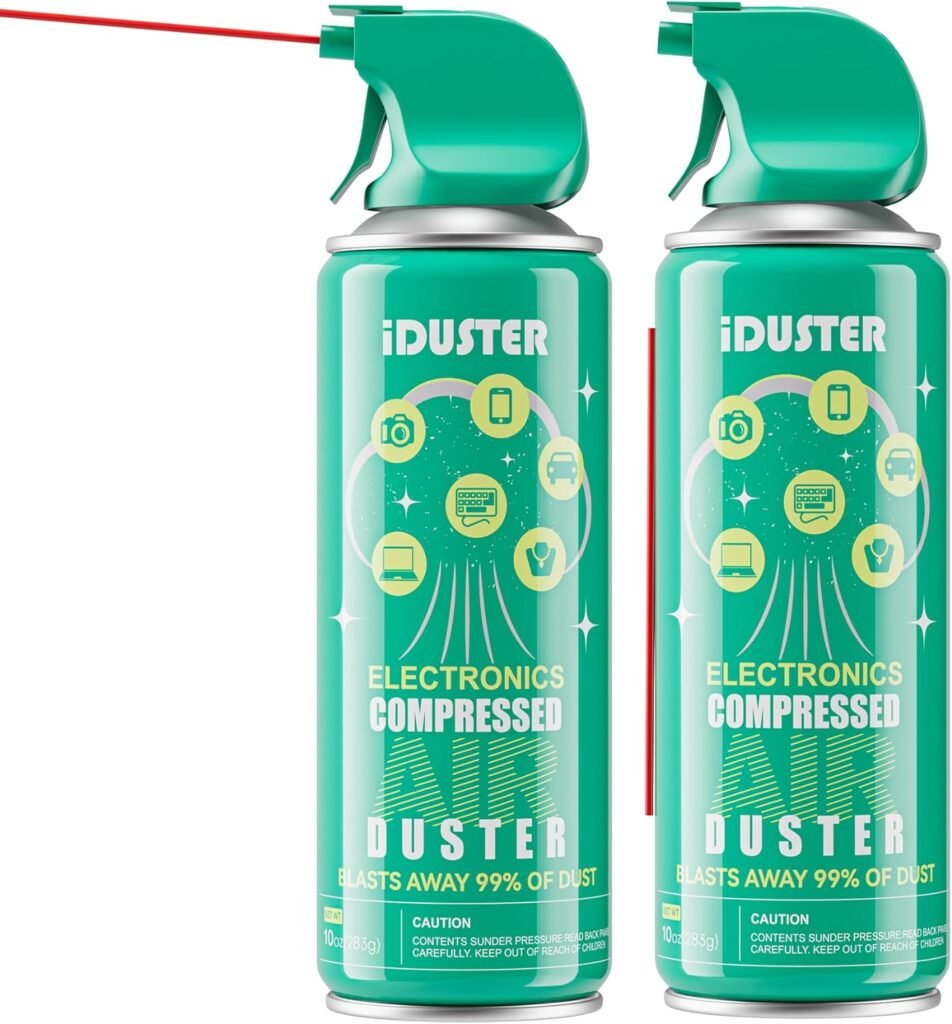
Compressed Air
- Blasting with compressed air removes loose hair from the blades.
- Does not disinfect, so spray or dip in alcohol beforehand.
- Avoid tilting the can during use to prevent propellant intake.
Lubricate After Each Cleaning
- Re-lubricate with oil after each quick clean to prevent corrosion.
- Spread a few drops along the blades while running to maintain smooth function.
You now have everything you need to make the most of your electric shaver!
Cleaning the body of your clipper
For the body of your clippers, simply wipe with a suitable cloth lightly soaked in alcohol to remove any residue.
How often should you clean your hair clipper?
Regular maintenance is required once a month for daily use, or every 3 months for weekly use.
Why sterilize your hair clipper?
Sterilizing clippers is essential to prevent the spread of infection and keep our tools clean. Clippers can easily become a breeding ground for bacteria if they are not sterilized regularly.
These bacteria can cause skin irritation, infection and even disease. By sterilizing clippers, we eliminate bacteria and germs that may have accumulated on them.
We recommend sterilizing clippers after each use, especially when they are used on several people. Sterilization methods include the use of a disinfectant solution, autoclave sterilization or UV sterilization.
Remembering to sterilize clippers after each use ensures the health and safety of both the person using them and the person for whom they are intended.
Why does my hair clipper make a metallic noise?
If your hair clipper makes a deafening metallic noise, it may simply be out of adjustment due to a voltage variation. So, before contacting the brand’s after-sales service, please follow the instructions below, which may enable you to repair it yourself.
These steps concern the maintenance of your appliance, and, more specifically, adjustments to the feed screw (this works for all clippers with a screw thread): let’s do it with the WAHL Home Pro hair clipper!
- Step 1: Take a screwdriver.
- Step 2: Switch on your hair clipper.
- Step 3: Use the screwdriver to turn the feed screw (on the side of the clipper) clockwise until it makes a loud noise.
- Step 4: Once it makes a noise, turn it counter-clockwise half a turn (your clipper should no longer make a loud noise). If the screw is adjusted too far clockwise (to the right), it may “tighten” the arm and paralyze the blade. If the screw is adjusted too far counter-clockwise, performance decreases and cutting head adjustment becomes problematic.
Your hair clipper should now be at full power and ready to cut!